Thursday, April 28, 2011

Salmon with Creamy Dijon Sauce


*Note: this is going to be my new "go-to" creamy sauce for fish, chicken, veggies, whatever. YUM!*

I love to eat fish, and not just because I know it is so much better for me health-wise (lower calories, more vitamins and nutrients and all that jazz).  However, in case you hadn't noticed, I haven't cooked a lot of it. Why? Because fresh fish is SO expensive! Well, I talked to my friend Jourdan (remember I'm stalking her blog this week), and she uses frozen fish all the time and says it taste great! Given how much cheaper frozen fish is (about $12 for 7 frozen filets) I was so excited to hear that it is an equivalent to fresh fish.

This dish looked light and just, yummy! It was also pretty easy to make. I put the frozen filets (which came individually wrapped, nice!) in the fridge a day before I was going to cook them so they could de-thaw.

To go with this great dish I made some great rice I always keep in the pantry (Uncle Ben's Long Grain and Wild Rice) and reheated some green beans from last night. All in all it was quite satisfying and so easy after a long day at work. What do you think?

Ingredients:
*2 salmon filets (though you can make up to 4 with this recipe)
*1 tablespoon butter
*1/4 teaspoon onion salt (didn't have it so I used minced onion)
*1/4 teaspoon marjoram (didn't have this either so I used oregano, its cousin)
*1/4 teaspoon thyme
*1/2 cup sour cream (I used NF Greek yogurt)
*1 tablespoon flour
*1 tablespoon dijon mustard
*1/8 teaspoon salt
*1/8 teaspoon pepper
*1/8 teaspoon thyme
*1/2 cup chicken or veggie stock or broth

Note: To be honest I didn't use any of the measured spices. I just sprinkled whatever looked right and went with my gut. Do what you think looks good!

Preparation:

*Thaw salmon if frozen. Baste thawed fish with butter, onion salt, marjoram (or oregano), and 1/4 teaspoon thyme.

*Broil in oven for 8-12 minutes until flakes easily with a fork. (Note: My oven requires you preset a temperature for broiling, and I did mine on 500 degrees, which is typical for broiling on "high" if that is how your oven does it.)

*Heat sour cream, flour, mustard, salt, pepper, thyme, and chicken stock in small sauce pan over medium heat until thickened and bubbly. Then heat for one more minute.

*Serve sauce over fish. Place extra sauce in a serving dish to pour over veggies and rice (John LOVED it!! He went for seconds on the rice and poured the sauce right over it because it was so good!) :)

Salmon in the oven - forgot to take a picture before I put it in!

Salmon minus the decadently light - and simple! - sauce

Awesome dinner. Filling yet light and healthy :)

Wednesday, April 27, 2011

Sweet and Spicy Pulled Pork


I've been pretty much sticking to chicken and, lately, ground turkey for my dishes. I saw another great recipe on Jourdan's blog, this time for pulled pork. I've never made pulled pork before but this recipe looked so easy I was pretty confident in my abilities to make it.

This was a super tasty dish, and it definitely came with a kick! (I took two of my heartburn medication after the first bite!) If you wanted this to be a little less spicy, I'd add a little more brown sugar (which I did once it was done) and maybe half the chipotle peppers. However, John and I really loved it how it is once I added some extra brown sugar (about 2 more tablespoons) and honey barbeque sauce (Sweet Baby Rays!). 

Funny story, I sent John to the store for the meat. Well, my husband is always on the lookout for a deal. He called to ask me if pork loin was the same as pork shoulder/butt (which is what I put on his grocery list). I told him I didn't think so but to ask the butcher.  John did ask the butcher, but not until he had googled it on his phone first. The butcher told him the same thing Google did, and he decided to get me the shoulder, which, apparently, is what they use in the south. Butt is, apparently, usually used on the east coast. Just a little random fact for you. Enjoy! :)

Ingredients:
*pork shoulder/butt (mine was about 4.5 pounds)
*2 cans Dr. Pepper (24 oz total)
*1 7 oz can chipotle peppers in adobo sauce (I found this with the Mexican food - tortillas, taco seasoning, etc.)
*2 tablespoons brown sugar
*1/2 large onion, largely chopped
*whole wheat buns
*parsley (original recipe calls for cilantro, but I have a serious aversion to it so I decided to use parsley - Google told me it was a substitution)
*1/4 cup almonds
*1/4 cup olive oil
*1 or 1/2 jalapeno (depending on size and how spicy you would like it - I skipped this altogether!)
*Honey BBQ sauce (optional, but highly recommended)

Preparation:

Pulled Pork:
*Roughly chop 1/2 a large onion (or the whole thing, depending on how much onion you like) and place it in the bottom of a slow cooker. Place the pork on top of the onion, with the fatty side facing up.

*Spread the chipotle peppers on top of the pork. Add the Dr. Pepper, followed by the brown sugar (I just sprinkled mine all around). Set it on low for 7 hours (I like to start with 7 hours so I don't overcook the meat. If it's not ready after 7 hours, set it on low for another hour. I ended up cooking it for 7.5 hours total).

*When the pork is done pull it out of the slow cooker and place it into a bowl where you can add more brown sugar and barbeque sauce as you'd like. If you can, sift the onions out into a separate bowl as well. Serve with your desired components and enjoy!

Parsley Pesto:
*Chop up the parsley (or cilantro), jalapeno (if you choose to include it) and almonds. Place in a food processor with olive oil and mix well or until your desired consistency.

*Spoon the sauce over your pulled pork or on the bun. (Note: While I enjoyed this sauce, John loved it so much without the sauce that he didn't even bother putting it on! Use your discretion and personal palette to decide what to do. This definitely wasn't a make it or break it addition for us.)

What everything looked like as I turned on the slow cooker.

The onions pulled out from the slow cooker. Carmelized and delicious!

Parsley Pesto!

A look at how much pork we got from the pulled pork.

View from the top.

Pulled pork, plus BBQ sauce, plus more pulled pork, plus onions, plus a little extra BBQ sauce on the bun. YUM!


I served our sandwiches with green beans so that we'd get our greens in :)
With the parsley pesto. Love how the green adds to the dish.

Tuesday, April 26, 2011

Creamy Tomato Basil Soup


I was reading my friend good friend Jourdan's blog - she also has found a love for cooking and domestic life! - and saw this yummy recipe for homemade creamy tomato soup (original recipe from Our Life in the Kitchen).  While my body hates me for loving tomato soup - heartburn alert! - I just can't get enough of a really great tomato soup. With a few modifications, this one definitely did the trick. It was such a rich and creamy soup and perfect with grilled cheese. John loved it and told me to add it to "the rotation" of his favorite dishes. I hope it warms a rainy day in your house too! :)

Ingredients:
*1 1/2 pounds fresh roma tomatoes, quartered (9 tomatoes in my case)
*1/2 large yellow onion, diced
*less than 1/4 cup Arborio rice, uncooked (I found it on the bottom shelf of the rice section & this is the rice usually used for risotto)
*low sodium chicken stock (or vegetable broth for you vegetarians!), ~26 oz (I used a whole container of Swanson's version but wish I would have used 1 cup less. I'd pour out one cup and then pour in the whole container)
*olive oil
*2 good pinches of crushed red pepper flakes
*3 small garlic cloves, minced
*fresh basil leaves, ~6
*1/4 cup half and half (1 part heavy cream with 1 part skim milk)
*seasoning: dried basil, salt, pepper
*good pinch of brown sugar, plus 2 tablespoons

Preparation:

*Heat a few tablespoons (a few good drizzles) of olive oil in a large stock pot. Add diced onion and cook for about 5-7 minutes, until browned.

*When onion is almost done cooking, add minced garlic, crushed red pepper flakes and pinch of brown sugar. Mix around and allow to cook for another minute or so.

*Add quartered tomatoes and chicken stock. Make sure you add enough so that it just covers the tomatoes. Bring to a simmer. Then add rice and simmer, on low, uncovered, for another 15-20 minutes until rice is cooked through.

*Once rice is cooked through, add in about 6 torn basil leaves and stir. (This is when I decided it was too brothy and removed about a cup of the broth, being careful to keep in the tomatoes and basil. This is also why I suggest using one less cup to begin with, but it's your choice. I like thicker tomato soup.)

*Transfer mixture to blender and blend until smooth. Return blended mixture to pot and add half and half, stirring well. Add a teaspoon (or more) of salt, 1/2 teaspoon pepper (or more) and 2 tablespoons brown sugar. Stir well.

*Serve with grilled cheese sandwiches and garnish with fresh basil! Yum! :)

Browned onion. I like to make sure mine is really browned so that the onion stays sweet.

Adding in tomatoes.

The chicken stock I used. Again, I recommend using a cup less than the whole container.

My interpretation of "less than 1/4"

Looking a bit too brothy for me. Time to remove a cup - without removing tomatoes or basil leaves or rice, a tricky endeavor!

Yum :)

Grilled cheese - in the panini maker! = perfect for dipping in your soup

A closer look at the consistency of the soup.

Saturday, April 23, 2011

Queso Dip


Queso is not a hugely expensive item, but I always figured I could make it for a few less dollars and maybe even a little better. I'm not saying that my queso is better than the jar, but for the cost it makes a lot more and it tastes pretty good! John now buys the main ingredient for this - a can of soup! - in bulk! He loves this dip and requests it whenever we have tortilla chips and/or whenever I make anything in the Mexican food family. I'm sure there is room for improvement in this so let me know if you have suggestions!

Ingredients:
*1 can Campbell's Nacho Fiesta Soup
*1/2 cup shredded cheddar cheese
*skim milk (1/4 soup can **you can skip heavy cream and use all skim milk but it will be much soupier and less thick)
*heavy cream (1/4 soup can)

Preparation:

*Combine soup, milk and cream in a small saucepan on medium to medium-low heat. (You don't want to make it too hot or the milk will burn and your queso will not taste as good!) Stir occasionally to make sure it mixes well.

*Right before serving add the shredded cheese and mix well. (Note: Feel free to add more cheese as desired. I just recommend the minimum for a yummy queso dip!) As soon as the cheese melts remove from heat and serve with chips, tacos, fajitas or whatever suits your mood! :)


Queso cooking away!

Pasta with Veggies in White Wine & Lemon Sauce

Often it comes time for me to make dinner and I have no idea what I'm going to make. Usually I look around at what I have and try to throw something together that will actually make a decent meal. That was the case for this dinner. I had some whole wheat pasta, lemon, white wine, butter and some veggies I was afraid would go bad if I didn't use them quickly. This turned out to be a pretty great meal. It was filling yet light, which I think make some of the best meals. It was great as lunch the next day too. Let me know what you think! :)

Ingredients:
*whole wheat pasta (or regular if you prefer)
*zucchini, diced
*yellow squash, diced
*bell peppers, sliced thinly - aka jullianed (I used yellow, green and red; one of each)
*onion, chopped
*1/4 cup white wine
*2 tablespoons butter, or 2 tablespoons olive oil
*juice of 1/2 lemon
*salt and pepper

Preparation:

*In a large pot, bring water to a boil. Add salt - a few good shakes - and a couple drizzles of olive oil before you add pasta. (The oil will prevent the pasta from sticking together). Cook until al dente.

*Heat olive oil in a skillet. Add vegetables - zuchinni, squash, bell peppers, and onion.  Season with salt and pepper. 1 teaspoon salt and 1/2 teaspoon pepper is usually a good starting point. Add more as your taste prefers. Cook until vegetables are softened, or until they've reached your desired texture.

*When vegetables are about fully cooked, add white wine, lemon juice and butter (or olive oil for a lighter sauce) to vegetable mixture. The wine will help deglaze the pan - making it easier to clean, score! - and will add nice flavor. Cook until reduced by about half or until taste reaches your preference. (Note: If you cook it too long you will end up with a heavy lemon sauce.)


*When the vegetables and sauce are mixed well, combine with drained pasta. Serve hot over a large plate.

*Might I recommend serving with my ricotta cheese spread and toasted bread? A delicious and light meal!


My veggies cooking up!


Another view of the dish :)

Friday, April 22, 2011

Garlic Bread


I thought garlic bread would be a nice addition to the Italian dishes I've been working on. It's something so simple, yet it can really make a dinner stand out and seem that much better. I did a google search awhile back for garlic bread, and after reviewing at least a dozen recipes, I decided I'd go for it on my own, with what I learned from my research. The result was great! It's easy to make this too much or not enough, and I've found melting the butter will give you a stronger taste than using softened butter. I also used less when it was softened butter, meaning this way is a bit healthier.

I paired this with meat and cheese lasagna, meat sauce over cheese tortellini, and chicken parmesan. Let me know what you use it with! :)

Ingredients:
*loaf of French bread (or similar bread)
*1/2 stick butter, softened or melted (melted with result in a more buttery bread)
*2 cloves garlic, minced
*a few shakes of Italian seasoning (I used about a teaspoon, but more or less is fine depending on your preference)

Preparation:

*Preheat oven to 350 degrees.

*Combine melted butter with Italian seasoning and garlic. Slice bread into 1-inch pieces, being careful not to cut completely through. Try to cut to bottom crust. Brush garlic-butter-seasoning mix in each slice, being sure to coat both sides of bread evenly with mixture (including minced garlic pieces - they tend to sink).

*Wrap bread in foil but don't cover. Foil should come about halfway up sides. Place in the oven and cook for 12-15 minutes, depending on how crisp you want the outside. The foil with help keep the insides soft, but exposing the top of the bread will leave the outside nice and crisp.

*Serve with Italian meal (or any you want!) and enjoy!  

The garlic butter with Italian seasoning mix I used on the bread

Thursday, April 21, 2011

Slow-Cooked Honey BBQ Chicken

Not my finest picture, but it shows the chicken in the slow cooker.


I ran off to work in a rush the other day and realized I wasn't sure if I had anything to make for dinner, as it had been awhile since I'd gone to the store. I knew we had two chicken breasts and I always keep a few ingredients stashed in the pantry - low sodium chicken broth, Montreal seasoning. I asked John to throw them in the slow cooker, and when I got home I had the ingredients needed for a honey mustard and red onion barbeque sauce, courtesy of Rachael Ray. While I used my Rachael Ray cookbook, I found her original recipe online, in case you'd like to go off her recipe instead of what I did.

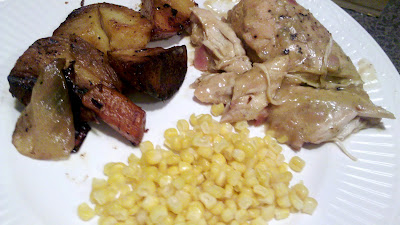
This chicken, after slowly cooking all day, was so moist and juicy that it practically fell apart. I had a later thought that with buns this would make awesome pulled chicken - like pulled pork - sandwiches. Alas we ate ours with some leftover roasted potatoes, reheated in the oven, and some sweet corn. It felt like a summer meal, but it was a breeze to put together.

Ingredients:
*boneless, skinless chicken breasts (I used 2 but I think you could use more)
*low sodium chicken broth (1 cup, plus enough to fill halfway up chicken breasts in slow cooker)
*montreal seasoning (optional but I love the little extra it added to the dish)
*1/2 red onion, chopped finely
*1/4 cup apple cider vinegar
*1/4 cup brown sugar
*1/2 cup honey mustard
*1/2 teaspoon allspice
*1/2 teaspoon curry powder
*2 tablespoons vegetable oil

Preparation:
*Place chicken breasts in the slow cooker. Fill with enough chicken broth so that the bottom half of the breasts are covered. Sprinkle some Montreal seasoning on it. A few shakes should do. Set the slow cooker to low for 6 hours or high for 3 hours.

*When you get home from work, or when the chicken has about a half hour or less time remaining, start putting the sauce together.  Pour vegetable oil in a small saucepan and saute onions for about 5 minutes. (I waited for mine to brown slightly because I wanted to be sure they gave a sweet taste and weren't too noticeable texturally.)

*Add vinegar and reduce by half, about 1 to 2 minutes. Add brown sugar and cook for 1 minute to incorporate. Whisk in broth, honey mustard, allspice and curry powder. Bring sauce to a bubble, and reduce to low heat.

*Drain broth from the slow cooker, preserving chicken. Put the chicken back into the slow cooker and pour in the sauce, mixing it well so it coats all the chicken. Cook on low for an additional 30 minutes to an hour, depending on how you'd like your chicken. For a more pulled chicken cook longer. For firmer chicken cook shorter.

*Serve with your choice of sides and enjoy this easy meal! :)

Chopped onion ready to be sauted.

My bubbling sauce, almost ready for the slow cooker.

The whole meal! The chicken was so tender it fell apart as I served it.

A closer look at the chicken. Not the prettiest meal, but tastes delicious!

Tangy Turkey Paninis


When John and I were registering for wedding gifts (those were fun times, weren't they?) I selected a panini maker just for fun. It has turned out to be one of my favorite kitchen gadgets and perfect for a quick lunch or dinner. I've tried several varieties, but this particular combination is John and my favorite. If you don't have a panini maker, just use a grill pan or sear pan. I'm sure it will be equally delicious. Let me know what you think or if you have any variations for me to try! :)

Ingredients:
*whole wheat sandwich bread
*dijon mustard
*sliced turkey (I use honey smoked turkey, deli style)
*sliced tomato
*sliced cheddar cheese
*dried, ground basil
*extra virgin olive oil

Preparation:
*Plug in your panini maker or heat up your grill pan. 

*Spread dijon mustard on one side of two slices of bread. Layer two to three pieces of turkey, depending on how you prefer your sandwiches (John likes 3 slices, I like 2). Add a layer of cheddar cheese followed by tomato. Sprinkle basil on the tomato slice. Add another layer of turkey (2-3 slices) and another layer of cheese. Place the second piece of bread on top.

*Coat the exterior side of the bread slices with olive oil. I use a grill/pastry brush to do this.

*Place on the heated panini maker and close for about three minutes, or until outside is nicely browned and cheese is melted. If you're using a grill pan, cook on each side for about 3 minutes, or until the outside is nicely browned.

I start by coating each piece with the mustard. The dijon gives the whole sandwich a nice, tangy flavor.

First layers done - mustard, turkey, cheese, tomato and basil!
Now time to add more turkey, cheese and mustard-coated bread.

John likes his heavy on the turkey - about 6 slices total - with thinly sliced tomato.

I prefer mine with slightly thicker tomato slice, and about 4 pieces of turkey total.

Tuesday, April 19, 2011

Crispy Baked "Fried" Chicken


I should start by saying this chicken isn't actually fried, thus the quotes around the "fried." Chicken is usually the least expensive meat at the store, so I'm always looking for new ways to dish it up. I really wanted to find a recipe that called for baking the chicken, since it tends to be healthier than cooking it in oil on the skillet. I saw this recipe from Cat Cora for "Crispy Baked 'Fried' Chicken," and I knew with a few modifications it would be perfect for John and I.

I made the modifications based on the ingredients we have and our personal taste preferences. I'm sure the original is delicious, but I loved how this turned out. It was so crispy on the outside yet moist and juicy on the inside! Did you know that a serving of Grape Nut Flakes has half the recommended daily value of whole grains? It has a slightly sweet taste to it, which we loved. John told me to "add this to the list" of rotating dinners. The day after I made this he told me I could make it again for dinner - as in that night. I hope you enjoy this easy, yummy recipe!

Crispy Baked "Fried" Chicken
Recipe Adapted from Cat Cora
Yields 2-3 chicken breasts, depending on how many you make
Pin It

Ingredients:
*boneless, skinless chicken breasts (I did 3 - 2 for dinner and 1 for lunch the next day)
*1/3 cup buttermilk, shaken
*3/4 teaspoon paprika
*less than 1/2 teaspoon ground sage (just eyeball it)
*salt and pepper
*3 cups grape nut flakes
*1/4 cup flour

Preparation:
*Preheat the oven to 425 degrees. 

*Place flour on a plate or in a bowl. Salt and pepper both sides of chicken breasts. Press chicken breasts into flour so all parts are covered. Shake off any excess flour. Discard the flour when you're done and place chicken breasts aside.

*Place Grape Nut Flakes in a plastic bag and seal as tightly as possible. Use a rolling pin to crush the flakes until they are ground well.

*In a bowl big enough to dredge chicken through, mix buttermilk, sage, and paprika. Coat each chicken breast in mixture and then roll in ground Grape Nut Flakes. (You can shake it in the bag or on a plate, but it is messy either way!).

*Place the chicken breasts on a rack in a roasting pan or on a sheet pan (the rack keeps both sides equally crispy, though you could lay them flat on a pan and just flip them to keep it even). Bake for 15 minutes at 425 degrees. After 15 minutes, turn the oven down to 375 degrees and bake for an additional 25 minutes.

*Serve with your choice of sides. May I recommend my buttermilk mashed potatoes (you'll need the buttermilk for the chicken anyway!) and a green vegetable? I went with green beans

My ground up Grape Nut Flakes

Chicken breasts after their flour "bath"

This is the buttermilk "bath" mixture. The paprika should give it a slightly red tint.

Chicken breasts on the rack right out of the oven. I forgot to take a picture before they went in!

A close up of the chicken so you can see the texture.

Look how juicy the inside looks! :)

Monday, April 18, 2011

Honey BBQ Blue Cheese Burgers


On Friday I asked John if he had any special requests for me as I began planning our meals for the upcoming week. Usually he just says "whatever you make is awesome!" and doesn't really give me any suggestions. After a little pressing he finally admitted he would love it if I could make some burgers. He really loves the new angus burgers from McDonald's and he was hoping I could do my own twist on the BBQ burger. When I suggested adding blue cheese to the mix he was over the moon.

When the time came to actually prepare the burgers I was full of questions. Do I just ball up the ground beef? Do I mix it with anything? How long do I cook it for? I looked through my Barefoot Contessa cookbook for some inspiration and ideas as to how to even make a burger. Her recipe was a little more sophisticated than I was looking for, but it gave me an idea of what I'd need to get started.


Now, I've never made burgers in my life. I usually prefer to leave the grilling to the men. However, the wonderful grill we have we are not able to use (apartment rules). Alas I decided to use our grill pan, which always makes a smokey mess. Today the smoke detectors went off 4 times. (At least they're working though, right?).

John love, love, loved these burgers!!! I should have been tallying the number of times he "mmm'd" because I swear it was through the entire meal. Some of his best quotes while eating the burgers were..."You should open a restaurant just on these!...Make sure you put this on your blog! ...Top.Three.Burger.Ever. ...I would eat a third burger but I'm afraid of offending you if I get sick from overeating."

Honestly I think this is one of his favorite meals I've made, yet it was SO easy! Try it and let me know what you think! :)

Ingredients:

Burger:
*ground beef (mine was about 1.4 pounds, and made about 4 good-sized burgers)
*2 egg yolks
*1/2 teaspoon salt
*1/4 teaspoon pepper
*2 tablespoons honey barbeque sauce (I used Sweet Baby Rays and it was amazing!)
*1/2 teaspoon minced onion (from the jar, not freshly minced)
*1/4 teaspoon Montreal seasoning
*4 thin slices of chilled butter (Ina's suggestion!)
*whole wheat buns

Toppings:
*lettuce, sliced
*tomato, sliced
*onion + brown sugar and butter to caramelize (see directions below)
*blue cheese crumbles
*honey BBQ sauce (I highly recommend Sweet Baby Rays!)

Preparation:

*Combine the ground beef, egg yolks, salt, pepper, BBQ sauce, minced onion and Montreal seasoning (or whatever seasoning you prefer) in a bowl. Mix with a fork, but be careful not to mash it up. Just fold it together using the fork tines.

*Heat a grill or grill pan (if using the stove like me). While the grill is heating, separate the meat in half, and then each half in half again (fourths). Mold the meat so that it is ready to grill. Place a small slice of butter in the center of each burger, being sure it is encompassed by the meat. (This is totally optional but the burgers were amazing and this might have been the secret...who knows!).

*Cook the burgers to your preference. (I did 6 minutes on one side and four minutes on the other. They were about medium-well to well done.)

*While the burgers are cooking, prepare your fillings. For the caramelized onions: Melt a tablespoon or two of butter on a small skillet. Pour about a tablespoon of brown sugar into it and throw the onions in. Mix the onions well and cook until browned (a few of mine were a little burnt but we like them that way).

*When the burgers are done let them rest for about 5-10 minutes before compiling the burgers. Start with a bun and pile lettuce, tomato, burger, caramelized onions, crumbled blue cheese, and some more honey BBQ sauce on the top bun. I served mine with sides of salad and my mustard-roasted potatoes. Enjoy! :)

All my ingredients ready to be mixed.

Mixed up.

Grilling - and smoking a bit!

Little butter thrown in.

Juicy and delicious

It's a big guy!

John told me I needed a picture with the BBQ sauce visible :)


Related Posts Plugin for WordPress, Blogger...